Acrylic water cooling build-FINISHED!

sixer9682

Registered User
Joined
Sep 29, 2008
Messages
11,119
I think I accidently deleted my earlier thread when I went to edit it so here's an update on the build.

Like a dumbass I forgot to order the new cpu water block I wanted so I'm waiting on that to continue but at least I got the fans swapped out that I wanted, removed and rearranged the drive cages, mounted the PSU, the radiator, and the reservoir and pump. Slowly but surely it's coming along.

I'll need the cpu water block and then I'll pull out my mb and components, replace the cpu water block, install the mb to the new case and the cut, bend, and install the new tubing.

I tested the pump and reservoir and the pump works well, the reservoir doesn't leak so that's all good.


Anyway, on to the pictures.
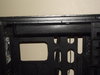
Some components
DSCF7215.JPG

pump installed on reservoir with a skin on the pump
reservoir 2.JPG

420 radiator mounted
DSCF7255.JPG


rad screws replaced.JPG


Reservoir and pump mounted
reservoir mounted.JPG

Instead of buying the same speed RAM to match colors I went skid row and painted the heat spreaders cherry red
memory painting.JPG

memory1.JPG


Now they're in my current build waiting to go to the new case:)
DSCF7252.JPG

DSCF7253.JPG

And that's about it for now.
 
Looking good! Makes me want to go out and build another computer! Good idea with the RAM heat spreaders.
 
Looking good! Makes me want to go out and build another computer! Good idea with the RAM heat spreaders.
Heh, it didn't take much, just painter's tape over anything exposed and a little up under the heat spreaders. The paint came out pretty well I think so at least it was fun. I did a fast dry on them with the heat gun :)
 
Heh, it didn't take much, just painter's tape over anything exposed and a little up under the heat spreaders. The paint came out pretty well I think so at least it was fun. I did a fast dry on them with the heat gun :)
Looking good! We should start a big-ass case club :) Can't wait for Broadwell for my next build!
 
Hey six, what reservoir is that? My XSPC x20 750v4 may be dying and I am browsing upgrades.

Edit: Is it this Primochill res/pump combo?

It's the PrimoChill 240mm CTR Phase II D5 Enabled. The D5 pump just plugs right into the bottom, that has 2 gaskets/0-rings, and then one of the silver collars screws on around the pump and connects to the reservoir and that's it for mounting the pump. It's very easy to use, but obviously I don't know how it will hold up in the long run as it's a new product.

So yes, it is that pump you have linked.
 
Awesome, thanks man. Watching their video now.


Sent from my iPhone using Tapatalk
 
I'm going to masturbate furiously to that 900D. The Corsair 400R is sexy (albeit a lot smaller) too.
 
I'm going to masturbate furiously to that 900D. The Corsair 400R is sexy (albeit a lot smaller) too.
Hey, hey hey! No fapping to my case. Do that to somebody else's!

I'm still fucking around with cosmetics. What do you think?

DSCF7261.JPG
 
Still futzing around until I get the water block, which should be here this week.

wrapped radiator.JPG
 
oh god! that radiator should have "Soulzz is gay" on it;p! Once you get all the fittings and everything else in it, it will seem a LOT less Happy if you catch my drift! Cant wait to see finished product!

you get a new Mobo for this build too? Interesting to see what kind of cosmetics on that thing!
 
Yeah, it's looks kind of Christmassy to me or S.I.G. I think I'm going to change it out for a cherry red Diamond Plate wrap instead. And no, didn't change the motherboard or cpu or gpu yet. I didn't feel like dropping the cash for colors to match on the motherboard and no performance difference.

On the plus side I did order, though it's backordered, the ROG SWIFT PG278Q monitor to go with this build. :eek:
 
Yeah, it's looks kind of Christmassy to me or S.I.G. I think I'm going to change it out for a cherry red Diamond Plate wrap instead.
I would leave it until you got it all set up...at least until you start laying pipe ;). I dont think it will look bad with the fittings/hardware in there.

Dont blame ya for not dropping cash on MB/GPU if it still runs well! Still got some time before that upgrade comes ;)
 
Well, since I got tired of not having a real work space for this build I spent that last couple of hours putting this together. I'm so annoyed after doing those fucking drawers that I don't think I'll bother with anything else this weekend because I really want to smash the shit out of something about now :D
workbench2.JPG
 
Well, since I got tired of not having a real work space for this build I spent that last couple of hours putting this together. I'm so annoyed after doing those fucking drawers that I don't think I'll bother with anything else this weekend because I really want to smash the shit out of something about now :D
damn sexy! if you handcrafted handles I can see your frustrations! If you bought them, get over it and look at @cplmac porch! As far as Hardware workstations go, where is the rubber/anti static goodies? ;) god I love woodworking! Wish I had a router and about 200 bits! I could prolly amke some money!
 
Oh what fun I had today ;) I did vinyl wrap on the inside of the case and the radiator. So here's what I did today.

radwrap1 (2).JPG


radwrap1b (1).JPG
 

Attachments

  • radwrap1c.JPG
    radwrap1c.JPG
    3.4 MB · Views: 397
Last edited:
Looks good Six. You can use a heat gun or good blow dryer to heat up the areas not quite sitting down in those sunken areas and then use something round to get into the those tight areas. I've used dowel rods of various sizes to do similar work (or even sockets). I'll bet it was a complete pain in the ass though, no doubt.
 
Back
Top